How to Make a Beeswax Salve
Working in a greenhouse and on a farm where they go from wet to dry, dirty to scrubbed clean, and bitterly cold to warm throughout the day, my hands go through Hell in the Spring and often look like it. Regular lotions don’t do much since they instantly get wiped or washed off, but I have found that a thick application of beeswax salve keeps the cracking at bay. The beeswax provides a great barrier to keep oils on your skin and protect them from drying out.
Infusing Your Oil
One of the great things about making your own products is that you can customize them with the scents, colors and properties you want by using different plant materials. I have made beeswax salves using calendula and rose hips because they were abundant in my garden and the woods near my house and because I knew they had skin-soothing and anti-inflammatory properties, but the possibilities are endless! Of course, people are different and just because an herb or flower is generally considered safe for the skin doesn’t mean you can’t be sensitive to it, so it’s always a good idea to test on a small patch of skin before slathering any product all over your body.
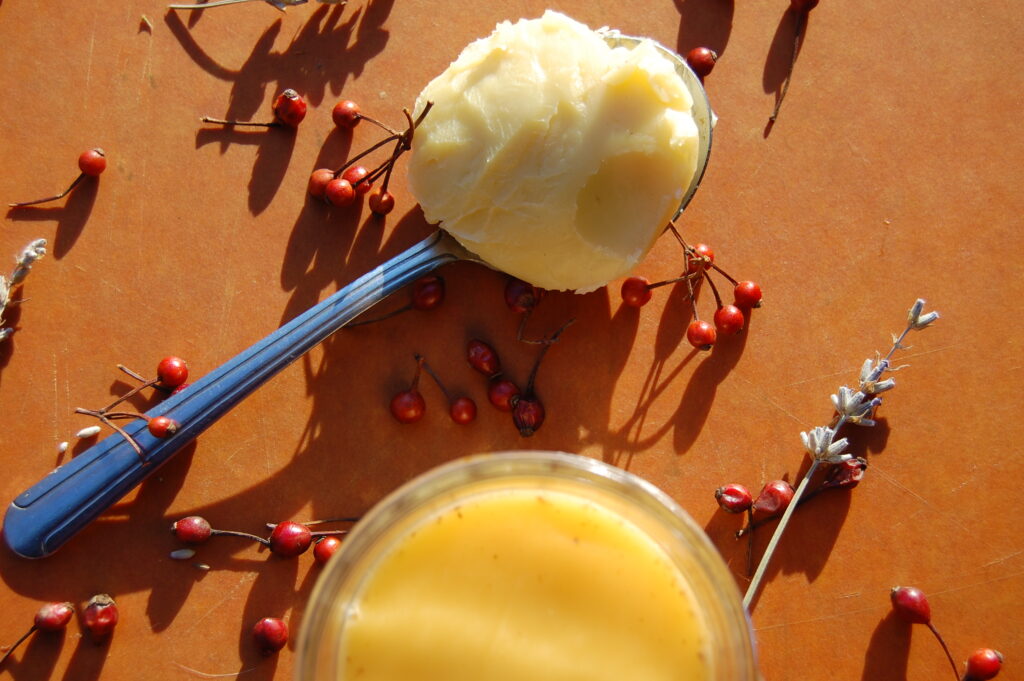
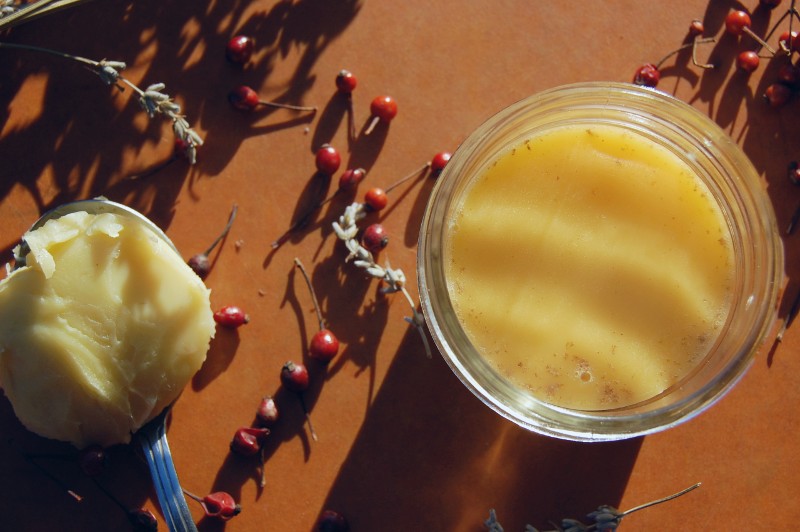
To infuse your oil, dry your plant material first so water doesn’t get into your oil. For the rose hips, once they were dry I also smashed them in a mortar and pestle to create more surface area and open the seeds to release their oil. Then place the dry plant material into a mason jar and pour in at least enough oil to cover. I used grapeseed oil, but other carrier oils like jojoba, olive, or almond oil are also a good choice. Let sit for several weeks, shaking occasionally, until the oil has taken on a reddish hue (if you’re using rose hips). Strain through a cloth or fine mesh sieve. If you’re not using this to make your salve in the near future, keep it in a dark container or put in a cupboard to preserve its potency.
Purifying Your Beeswax
We had recently harvested honey from some of beehives at my work, so we had the beeswax caps to purify into beeswax. You can certainly just buy beeswax to use instead (it’s usually available in the bulk section of co-ops and health food stores) and skip this step. But if you have some of your own, chances are it’s got some gunk in it. The easiest way to purify it is to put it in a pot with water and heat until the wax melts completely. Now you can pour it through a sieve into another bowl to strain out any of the larger debris. Let it cool and the wax will re-solidify into a disk floating on top of the water. Now take the disk out, scrape off any last bits of non-wax clinging to the underside, dry it off and you have clean beeswax. If it stills looks kind of gritty or speckled with dirt, you can repeat the process to purify it even further. I rarely bother, choosing to view any residual grit as a bonus exfoliant.
Mixing Your Salve
Now you mix the oil and beeswax together to make the salve. I typically make my salve with an oil to beeswax ratio of 3:1 or 4:1, which results in a thick but still easily spreadable texture. For example, in my latest batch I had about 100 mL of melted beeswax so I added about 300 mL of oil. This can be a combination of your infused oil and other oils, like coconut or olive oil. The more beeswax, the harder your finished beeswax will be, but a more waxy salve can be beneficial in Winter when your skin really needs a barrier from the cold wind. If you use coconut oil, keep in mind that your salve will also be harder in colder temperatures due to the coconut oil being solid at room temperature.
To mix your salve, heat up the beeswax in a double boiler until melted. I find the best way to not turn your kitchen pots into a waxy mess is to take a mason jar and stick it in a pot, then pour water into the pot until it is rises several inches up the side of the jar, but not enough to make the jar float (this also depends how much wax is in your jar). This mason jar becomes our designated “wax melting” jar for all such projects, so we never have to try and thoroughly clean all the beeswax out, which is pretty tricky. Once the beeswax is melted, pour your oil(s) into the jar and mix together. A chopstick works well for this. At this point you can also add a few drops of essential oil if you’d like additional fragrance or medicinal properties. Rosemary and peppermint are both relieving for sore muscles and make a delicious-smelling salve. Pour the melted salve into tins or small mason jars and let sit undisturbed until hardened. I hope you give this easy project a try; it really is satisfying to make your own products to keep your skin healthy all year round! Check out our video if you’d like to see more on the process.