History and Intro
According to archeological evidence, turmeric was first used as a spice in India around 4,000 years ago. It has been used in cooking and Eastern medicine continually since then. More recently the Western world has also begun to understand the medicinal properties of turmeric and it is now found almost worldwide in food and medicine.
In peer reviewed clinical studies turmeric has been shown over and over again to prevent the development of various cancer cells, reduce inflammation and even decrease symptoms of irritable bowel syndrome. I am not a doctor and this is not medical advice, but from what I’ve read the evidence is pretty clear that turmeric is an excellent plant to include in your diet for promoting overall health.
Unfortunately, it’s sometimes hard to find fresh turmeric at the store and the supplements made from turmeric can be very expensive so we’ve turned to growing it at home which is surprisingly easy – even if all you have to grow on is an apartment balcony!
Types of Turmeric
Variety options are fairly limited for growing turmeric as a home gardener. We typically purchase our rootstock from a company called Biker Dude Certified Organic. Their website is a relic from a simpler time on the internet which to some folks might seem sketchy, but we appreciate it. Everything we have purchased from them for the past 5 years has been excellent in quality. They only have one variety of turmeric available as of our writing this article, but they go as far as to provide the typical quantity of cucurmins in that variety which I appreciate. Cucurmins are the bioactive compounds that provide the health benefits mentioned above.
The one downside to this source is that they only sell the rootstock in bulk quantities with a minimum purchase of 5 lbs. This turmeric root is very high quality and you can just preserve and use anything that you don’t plant, but with a minimum price tag of $82 it’s a little steep for a home gardener. Though once you’ve successfully grown a turmeric crop, you can start saving your own rootstock so this is potentially a one-time purchase.
Technically you can just plant organic turmeric root from the store, but this is a bit of a gamble. The turmeric at most grocery stores has the potential to harbor plant viruses and fungal diseases that will end up killing your crop. Additionally – like other root crops – turmeric is typically treated to increase its shelf life which prevents it from producing roots and leaves when you plant it.
For best results, go with the funky 90s website.
Turmeric Growing Conditions
Whether you choose to buy certified seed turmeric online or get rhizomes from your local health food store, the next step is sprouting it. If you are in a warm climate, such as USDA hardiness zone 8 or higher, you can grow your turmeric outside year-round in containers or in the ground. For us in zone 6b, we pre-sprout our turmeric indoors in March so it has a head start when we put it outside once all danger of frost has passed (for us this is mid-May).
To pre-sprout your turmeric, moisten some coconut coir or potting soil so it clumps together but doesn’t drip any liquid when squeezed. Spread an inch-thick layer in a shallow tray with drainage holes, then place your turmeric rhizomes on top in a single layer; the rhizomes can be touching but don’t pack them too tight. Cover with more of the coir or potting soil so the rhizomes are completely covered. Keep in a warm, dark place and check periodically to make sure they don’t dry out. They should stay moist but not wet. In several weeks, you will see tiny white or light green nubs peeking up through the soil. Congrats- your turmeric has sprouted! Now you should move your trays under a grow light or next to a window so the growing shoots can begin to photosynthesize. You can pot them up into larger containers if they are getting too big for the trays before it’s warm enough to plant them outside, but we usually keep them in their trays until we’re ready to plant and they do just fine.

Turmeric is a tropical understory plant, so it likes high humidity and warm temperatures with regular rainfall. As an understory plant it is sensitive to too much direct sunlight so in areas like the Southwestern United States or Deep South where it can regularly get over 90 degrees Fahrenheit in the Summer it is a good idea to plant it somewhere with some shade in the afternoon or use shade cloth over it on particularly hot and sunny days. If you grow it in a portable container, you can move it around to ideal conditions throughout the growing season. We like to plant ours in an equal mix of potting soil and rich compost in 3 or 5-gallon nursery pots, one rhizome per pot. It also does very well in raised beds or anywhere with rich, well-draining soil.
Plant your pre-sprouted turmeric several inches deep into your container or garden bed so the soil comes up to the bottom of the first leaf. If you are planting directly into the ground without pre-sprouting, we recommend digging a trench about six inches deep and placing your turmeric rhizome pieces in the bottom, about 8 inches apart. Cover with two inches of soil- you can use the rest of the displaced soil to “hill up” the plants. As your turmeric grows, it will send up new shoots. After a few months, you may see the new rhizomes poking above the soil line, which means it’s a good idea to cover the base of the plants with additional soil or compost. We usually hill up our turmeric 1-2 times throughout the growing season.
Turmeric likes very rich soil so amending your soil with compost and fertilizing regularly will result in the sturdiest plants and biggest rhizomes. We add a well-balanced organic fertilizer at planting time and again halfway through the growing season, as well as watering every month or so with a mix of seaweed extract and fish emulsion. Just like when pre-sprouting, turmeric likes to stay damp but never soggy, which can lead to rotting, so let the top inch of soil dry out before watering again.
Turmeric Pests and Diseases
First off, a bit of reassurance- we have found turmeric to be a very low-maintenance and resilient crop! Compared to ginger, another tropical rhizome we grow, turmeric is far less susceptible to problems like fungal diseases. However, there are a few things to watch out for when growing turmeric.
If the soil stays too wet for too long, especially when the weather is warm, the rhizomes can begin to rot due to various fungi or bacteria. This usually makes itself visible first by a slight yellowing around the base of the stem, then yellow margins of the leaves. Eventually the entire leaves will turn yellow and whither and at that point the rhizome itself is likely to be soft and unusable. It is hard to treat any kind of root rot once it has begun, so the best thing to do is make sure your growing conditions aren’t making it likely to develop in the first place. Make sure your growing medium is well draining, and avoid planting turmeric in the same place over and over, especially if you have had trouble with rhizome rot before, since the fungus is soil-borne and can re-infect subsequent plantings. Similarly, never save and replant rhizome pieces that were impacted by rhizome rot.
Turmeric Harvest and Use
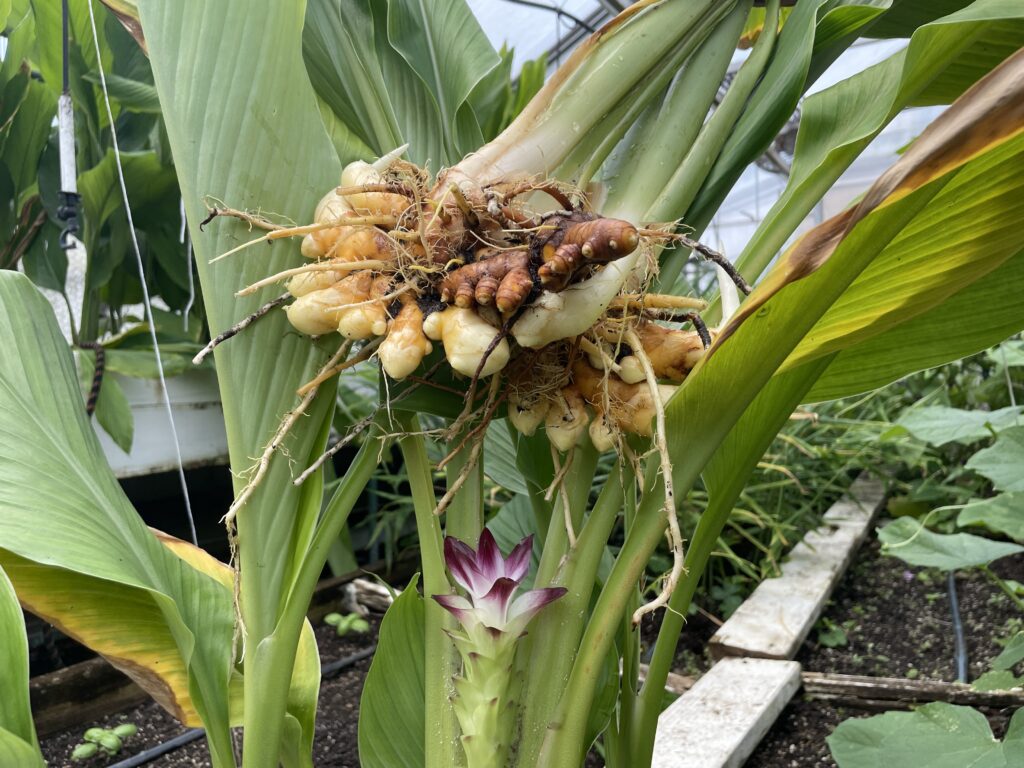
Turmeric requires a long, warm growing season and puts on a lot of its bulk at the end of the year. Here in Pittsburgh, we usually don’t start harvesting until late September or even October, pushing right up against our average first frost date. However, you can also grow it as a perennial and get a much bigger harvest the following year. Waiting to harvest has the added benefit of increasing the amount of cucurmin in the rhizome. If you’d like to have your cucurmin and eat it too, you can carefully reach into the soil and break off one or two of the “fingers” of your turmeric rhizome, leaving the rest to keep growing.
To overwinter your turmeric in colder climates, you can bring it the pot inside and stick it in a sunny window. It makes a beautiful houseplant but will likely lose some of its leaves as the sunlight levels diminish toward the end of the year. You can also let it go completely dormant by reducing watering over the course of a few weeks and cutting the above ground portion of the plant. Now the pot can go somewhere cool and dry like a basement until you’re ready to wake it up the following Spring. We prefer this method because we only have so much room in front of our sunny south-facing windows and a lot of plants!
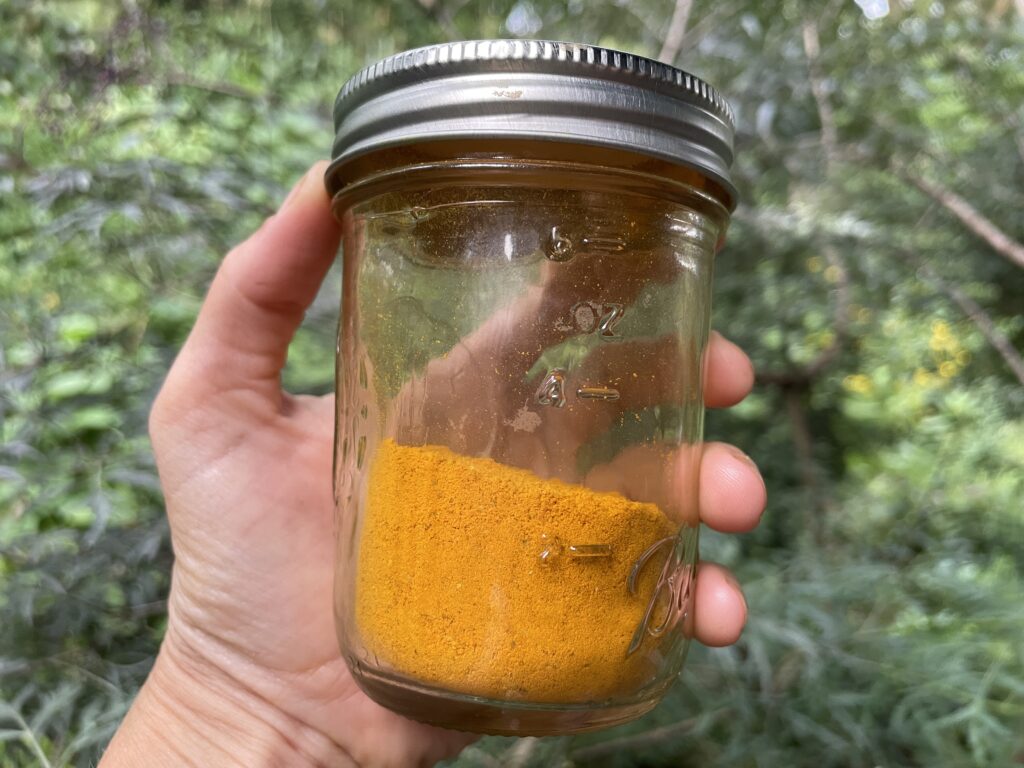
If you harvest your turmeric in its first year it will be “baby tumeric” which is a bit milder than mature turmeric but still delicious and provides great flavor and color to teas, curries, juices and more. Baby turmeric has not yet formed a hard outer skin so it does not need to be peeled before using but it also won’t store for as long as the darker orange mature rhizomes. To store fresh baby turmeric long term, we like to slice it thinly and dehydrate it, then store in an airtight container like a mason jar. We keep some as slices for teas and soups, and grind some into powder for curry or adding into smoothies, hot chocolate, or whatever else we want to add some great anti-inflammatory properties to! It also freezes well and can be grated straight from the freezer into your dish.